Process Control Course

Course Description:
This course, developed by Utah College of Applied Technology, teaches students to apply practical theory using common and advanced measuring tools, such as a coordinate measuring machine (CMM) and a romer arm. The course requires that students have access to various tools commonly found in inspection rooms to complete the hands-on assignments. Upon completing the course, students should be able to:
- Analyze title blocks and apply the data found there to the inspection process,
- Describe the basic Geometric Dimensioning and Tolerance (GD&T) Symbols,
- Perform calculations needed in regards to process control,
- Demonstrate the proper use of micrometers, calipers, and other gaging tools required for part inspection.
Course Contents:
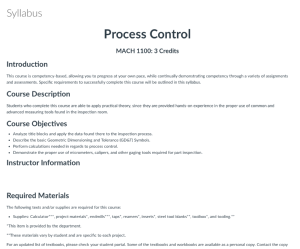
Course materials include a Canvas .imscc file. The .imscc file includes numerous folders and files from the Canvas course, including a syllabus. The syllabus includes a course description, course objectives, employable (soft) skills gained, and grading information.
This course includes eight modules. Most modules include short lessons along with hands-on assignments and projects, many of which have rubrics. There are 14 projects and assignments in total, each designed to provide students with experience with measuring tools. The assignments require students to submit a picture, machine part, or a brief worksheet, while the projects generally require to students to write a report accompanying the completion of the activity.
For orientation purposes syllabus.pdf is included as a separate attachment and offers a sample of the type of material included in this course.
Below is a sample of modules, labs, and lessons included in this course:
- Start Here
- NSF Attribution
- Syllabus
- Canvas Orientation
- Canvas Submission Help
- Troubleshooting
- The Troubleshooting Process
- Blueprint Reading
- ADD BLUEPRINT CONTENT HERE
- GD&T
- ADD GD&T CONTENT HERE
- GD&T Lab #1
- GD&T Lab #2
- GD&T Lab #3
- ADD GD&T CONTENT HERE
- CMM Setup
- Coordinate Measuring Machine Overview
- The Coordinate Measuring System
- Machine Specifics
- Startup and Basic Operation
- Jog Box Operation
- Introduction Probing
- Project 1 - Probe Calibration
- Basic PC-DMIS
- Alignment Overview
- Alignment Theory
- Alignment Exercise
- Basic Alignment
- CMM Measuring
- Introduction to Manual programs
- Manual Programs - Alignments
- Manual Programs - Features
- Manual Programs - Dimensions
- Manual Programs - Reports and Comments
- Manual Measurement Reporting
- Introduction to Direct Computer Control
- DCC - PC -DMIS
- Part Features
- DCC Measuring
- Introduction to Manual programs
- CMM Inspection
- Intermediate DCC
- Brown & Sharpe Widget
- Advanced DCC
- Spline Practice Widget
- Mill Project Practice Widget
- 5-Axis Part Stop Practice Widget
- 6-in Bubble Level Practice Widget
- Intermediate DCC
- Romer Arm
- Introduction to the Romer Arm
- Introduction to the PolyWorks Software
- Romer Arm Inspection
- Introduction to the PolyWorks Software
- Introduction to the Romer Arm
About this Resource

Comments